Zebra cake

Stripeeeeeeeeeeeeeeeeeeeeeeeeees!

Chocolate Truffles...

A Sedating Pleasure

Baked corn samosa

The healthier cousin of deep fried samosa

Garlic knots

True Italian pizzeria snack!

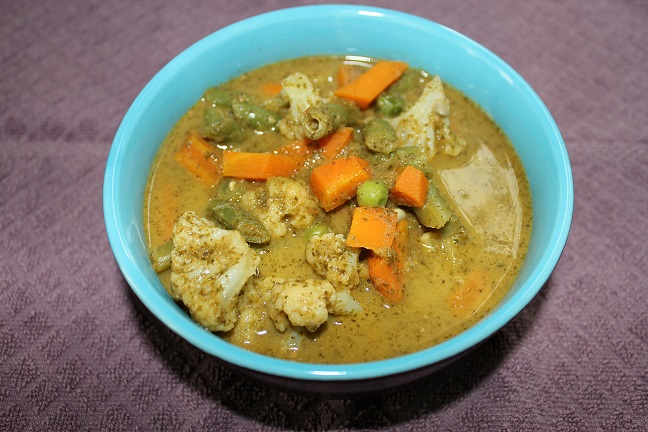
Thai green curry

Spicy comforter; best enjoyed with steamed rice!

Bombay Kaaja/Chiroti


Come Diwali,I start fantasizing about all different kinds of sweets which I can experiment. Khaja or Kaja or Kaaja also popularly known as 'Bombay Kaaja'. Kaaja is not a very famous sweet which not many sweet shops sell nowadays.When I was attempting to make it,I felt that this sweet is so simple to make and has an old world charm to it,as its does not look very fancy.But when you dig into it,it just melts in your mouth.

Bombay Kaaja


Ingredients:

Maida /All purpose Flour - 1 cup
Sugar (Powdered) - 1/4 cup
Salt - a pinch
Rice Flour - 1 tbsp
Ghee - 2 tbsp
Oil - to deep fry + 4 tbsp

Method:

1.In a bowl,take all purpose flour, salt and 4 tbsp of oil and mix well with your fingers till it forms crumbs.
2.Sprinkle some water and knead to form a soft dough.
3.Rest the dough for half an hour.
4.Mix the rice flour and ghee(melted) in a small cup till it is combined well.
5.Divide the dough into five small balls.
6.Roll all the five dough balls into thin pooris.
7.Take one poori and apply the rice flour and ghee mixture and spread it all over with help of a flat spoon,
8.Place the second poori on top of the first poori and again apply the rice flour and ghee mixture.
9.Repeat this for all the pooris.
10.Now take the rolling pin,and gently flatten all the pooris.
11.Roll the pooris tightly to form a cylinder.
12.Cut the cylinder into small portions of half inch thickness.
13.Gently press each portion and flatten the same.
14.Heat oil in a pan, and on low heat fry the flattened cylinders till golden brown.Do not use hot oil for frying the kajas.
15.Directly put the hot kajas in powdered sugar and coat them properly.
16. Yummy hot 'Bombay Kaja' is ready to serve.

Note: Instead of coating with powdered sugar,you can also dip the kaja in warm sugar syrup(one string consistency).Immerse and drain the excess sugar syrup.

Chocolate Oats Smoothie

Smoothie is the 'in-thing' nowadays.The perfect pick-me-up drink in the morning.You can either make it the healthy way or go indulgent. 

Smoothie has a milkshake consistency and has many many variations.Basic smoothie has milk as its base.Some have crushed ice,frozen fruit,fresh fruit,yogurt,ice cream,soy milk and the list goes on.The health conscious people sweeten it with honey,for kids its with different flavors of ice creams.


Here is a very healthy smoothie with oats.

Chocolate Oats Smoothie


Ingredients:

Instant Oats - 1/2 cup
Milk- 1 cup
Drinking Chocolate/Cocoa Powder- 2 tbsp
Honey- 3 tbsp

Method:

1.Soak the oats in milk for five minutes.
2.In a blender,take the soaked oats,cocoa powder/chocolate powder,honey and beat till well blended.
3.Pour in a tumbler and serve chilled.

Chocolate Oats Smoothie

Sprinkle with some mini-chocolate chips.Enjoy your mornings...

Zebra Cake

We had been to the Zoo few days back. I would not know why,the Zebra really caught my fancy . I thought I should bake a cookie with stripes, but then I came across a Zebra cake recipe.
So, why not bake a 'Zebra Cake'.
This cake looks similar to a marble cake, but with perfect stripes. For a marble cake, we would pour the plain cake batter and the chocolate cake batter in the cake tin and then use a fork or a skewer to make patterns. But for a Zebra pattern cake, we need to alternatively pour the different colour cake batter on top of the other. A very simple technique, the cake is a perfect beauty.

Zebra Cake

Ingredients:

All purpose Flour-2 1/2 cups
Sugar- 1 1/4 cup
Salt-1 tsp
Baking Powder-2 1/4 tsp
Cocoa Powder- 4 tbsp
Milk- 1 cup+1 /4 cup
Oil- 3/4 cup
Vanilla Extract - 1 tsp
Eggs - 4


Method:
1.Pre-heat the oven to 170 degrees celcius. Sift flour, salt, and baking powder in a large bowl.
2.Beat the eggs well.
3.Combine the sugar,oil,1 cup of milk,vanilla extract and the beaten eggs in another bowl with the help of a electric hand mixer or a stand mixer.
4.Add the dry ingredients little by little to the oil-egg mixture.
5.Divide this cake batter into two halves.
6.Take one portion of the cake batter and add cocoa powder to it. Now you would notice that the batter has become stiff, just add 1/4 cup ( or less )of milk to it to bring it back to the same consistency. 
7.Prepare a cake tin and line with parchment paper.
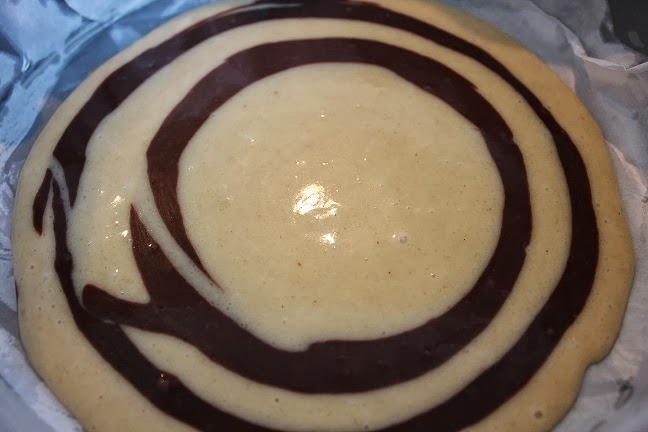
8.In the cake tin, pour a ladle of the plain cake batter and then pour the chocolate cake batter right in the centre . See pic below ...


9.Repeat  this procedure ,but alternatively pouring the different colour cake batter.

10.Bake for 35 to 40 minutes in a 170 degrees centigrade.
11.Cool on a wire rack.


Everyone at home was so fascinated by the cake , I did not have the opportunity to click a picture of a sliced cake. There was nothing left  :)


Note: Just to jazz it further, I have used a tooth pick and drawn a line across all the circles. This patter would appear only on top of the cake.


Vegetable Cutlet ( India Coffee House Style )


You might be wondering why another 'cutlet' recipe ,where there are so many recipes and variations of the same on the Internet.But this one is comes from our very own South India's famous chain of restaurants 'India Coffee House' which use to make good and brisk business in the 1980s era.My husband would fondly remember the cutlet he would have with his family when he was a kid during their family outings.

For me, India Coffee House was about their famous coffee and the dosas, idlis and wadais.But the cutlet/tikki was the crowing glory..LOL.I decided to replicate the same and the cutlet was indeed the Indian Coffee House style,and our very own loyal customer aka my hubby approved it.


Vegetable Cutlet/Vegetable Tikki


Ingredients:

Potatoes(Boiled and mashed)- 2
Carrot and Beetroot(grated)- 1 cup
Onion(finely chopped)- 1
Red Chilly Powder- 1 tsp
Jeera/Cumin Powder- 1 tsp
Lemon Juice- 1 tsp
Bread crumbs-1/2 cup+ 3 tbsp
Salt to taste
Oil for shallow frying

Method:

1.In a wok/kadai, heat 1 tsp of oil and sauté the finely chopped onions till golden brown.
2.Add the red chilly powder , cumin powder and cook further for two more minutes.
3.Now add the grated carrot and beetroot mixture and cook till the carrot and beetroot mixture has no moisture.
4.Remove from fire and allow it to cool.
5.Add the mashed potato mixture, salt to taste, 3 tbsp of bread crumbs and lemon juice. Mix well and make equal sized flat balls.


6. Coat the flattened balls with the remaining bread crumbs.


7.Take a flat griddle and shallow fry the cutlet/tikkis on either side with few teaspoons of oil or just until they are browned well.


8.Serve hot with thinly sliced onions and lemon wedges.

Note:
We are not adding amchur powder/dry mango powder as this is a South Indian version of a vegetable tikki.


Chocolate Truffles


You would have heard of 'Chocolate Truffle' a lot many times. Before making these, I thought, I need to have a special talent for making these. That's how glamorous it sounded and still sounds.

BTW, what are these truffles? Truffles are fungi that grow in the wild around the roots of the trees. An interesting fact, female pigs and dogs are specially trained for sniffing out truffles as they have a keen sense of smell.They are one of the very priced ingredients in European cuisine.

Coming back to the chocolate truffles,they are made to look like real truffles,so we are hand rolling them for the real look.This recipe requires just two ingredients, double cream and chocolate buttons.As simple as that.....


Ingredients:
Double Cream-1 cup
Semi-Sweet Chocolate Buttons-1 cup

To coat:(various options)
Cocoa Powder
Ground Cashew
Ground Pistachios
Desiccated coconut

Method:

1.Take double cream in a milk pan, and heat it over a medium flame till it just starts to boil.
2.In a bowl, place the chocolate buttons and pour the hot double cream on top.


3.Keep stirring till the chocolate dissolves ,with no lumps.


4.Mix well and bring it to room temperature. Refrigerate for 3-4 hours.
5.Take cocoa powder or any other coating that fancies you, in a plate.The cocoa powder is the most classic coating which is given to a truffle. Unsweetened cocoa powder works just fine.
6.Take the double cream and chocolate mixture from the refrigerator and you would notice that it has set, this is what we are looking for.
After 3-4 hours in the refrigerator

7.Being hand made truffles, we are going to dirty our hands. Now, use your fingers to dig in to the set mixture and form a ball with both your palms.
8.You have to be fast as it would start getting sticking due to the warmth of your palms.
9.Roll the ball with cocoa powder and place it onto a plate. Do the same for all the balls. As  this is a hand rolled truffles, the shapes are going to be uneven, for the rustic look.

 VoilĂ ! its done.
Cocoa Powder Coating

This is just a basic chocolate truffle recipe and there are many many variations.


Ground Cashew Coating


Tip:
1.If you are using dark chocolate buttons, use honey to sweeten the mixture.
2.Add a tablespoon of butter for that extra sheen.

Home Made Chocolates(Basic)


Homemade Chocolates is something I wanted to make for quite a long time. I would often see the moulded chocolates in the speciality stores sold especially around New Year's ,Diwali or Valentine's.

For home made chocolates ,chocolate which is being used has to be first 'TEMPERED'. I learnt the technique of 'Chocolate tempering' during the process of making these homemade chocolates.

'Tempering' means a heat treatment which is given to the chocolate which gives the chocolate the shine, the snap and the texture. Tempering is very important before you pour the chocolate in a mould.

In this recipe I will be explain how to temper a chocolate and how to mould the tempered chocolate.We will be using the double boiler method here.

Ingredients:

Chocolate Buttons(Dark) - 200gms
Chocolate Buttons


Must Have:

Chocolate Moulds (Plastic or Silicon)
Candy Thermometer
Glass bowl(Heat resistant)
Milk Pan with boiling water
Rubber Spatula

Method:

Tempering is basically cooking the chocolate to a certain temperature ,bringing it down and then taking it further up by few degrees centigrade.

1.In a milk pan ,fill with water upto less than half the pan's height. Check beforehand if the glass bowl sits on the milk pan properly without going inside.
2.Boil the water on a medium flame.
3.Empty 2/3 of the chocolate buttons in the glass bowl and place it on the pan with boiling water. See to it, that the glass bowl does not touch the boiling water ,else it will burn the chocolate.
4.Attach a candy thermometer to the glass bowl, with the tip of the thermometer immersed in the chocolate buttons.
5.Cook the chocolate by stirring with a rubber spatula till it reaches 46 deg centigrade.
6.Remove from the pan of simmering water onto a heat proof surface and add the remaining chocolate buttons and mix well.
7.Cool the mixture by stirring continuously till it reaches 29 deg centigrade.
8.Tranfer the glass bowl onto the pan of simmering water for few seconds till the temperature reaches to 31 deg centigrade.

Yippeeeee!!! we are done with the tempering part of the chocolates.

9.Remove from the pan of simmering water and wipe the bowl with a clean dry cloth.
10.Take the moulds (I have silicon ones, you can use the plastic ones as well.).Pour the chocolate into the moulds and refrigerate for two hours.


11.Remove from the mould and wrap them with decorative papers if you are gifting them, else just pop them in your mouth.  

Temperature Variations for Milk/White Chocolate:

Cook up to 43 deg centigrade, add remaining chocolate,cool down to 29 deg centigrade, and cook up to 30 deg centigrade. Done !

You can use two different kinds of chocolates in a single mould.I have used dark chocolate and milk chocolate.See picture below...


Very Important:

*Keep stirring ,keep stirring.
*Keep water away from melted chocolate. Not even a drop of water would do.


Achari Mushroom/Achari Kumbh(Quick version)


Achari Mushroom has always been on my to-do list for dinner. This dish can be found on any restaurant menu in Northern part of India.'Achar' means pickle in Hindi. Ask any Indian, he would tell you how important 'pickle' is. No meal in India is complete without pickle in one corner of a plate.

This recipe is quite unique as it calls for actual pickle paste(out of the jar!) to be used as an ingredient. You can find various kinds of pickles in an Indian grocery store like the mango pickle,mixed vegetable pickle, lime pickle ,green chilly pickle , tomato pickle, garlic pickle, and the list goes on and on.

The only pickle which can be preferably used for this recipe is the Mango pickle. Lets get on with this lip smacking recipe.


Achari Mushroom

Ingredients:

Button Mushrooms- 10 to 15 nos
Chickpea Flour/Besan- 5 tbps
Mango Pickle- 2 tbps
Red chilly Powder(if required)
Oil- 2 tbsp
Salt to taste

Method:

1.Clean the mushrooms and slice them into halves.
2.Pressure cook the mushrooms for four to five whistles. Drain the water and allow it to cool down. Pat dry the excess water with a kitchen tissue.
3.In a wok/kadai, dry roast the chickpea flour for five minutes on a low flame till it emits an aroma and the color changes to light brown. Allow it to cool down.
4.Spoon the pickle from the bottle. Take care to avoid all the mango pieces , only the paste part would do for this.
5.In a bowl, mix the roasted chickpea flour, pickle paste and salt to taste.
(Be careful with the salt, as there will be salt in the pickle. You might not need any!) 
6.Check how spicy you want the dish to be and accordingly add red chilly powder.
7.Marinate the mushrooms and the besan-pickle mixture and allow it to rest for 30 minutes.


8.In a wok/kadai, heat 2 tbsp. of oil, and add the marinated mushrooms. Cook on a low flame for around 20 minutes until its gets roasted to a lovely golden brown color.


9.Goes well with chappaties or rotis.

Mushroom with a unique tangy flavor!!