Zebra cake

Stripeeeeeeeeeeeeeeeeeeeeeeeeees!

Chocolate Truffles...

A Sedating Pleasure

Baked corn samosa

The healthier cousin of deep fried samosa

Garlic knots

True Italian pizzeria snack!

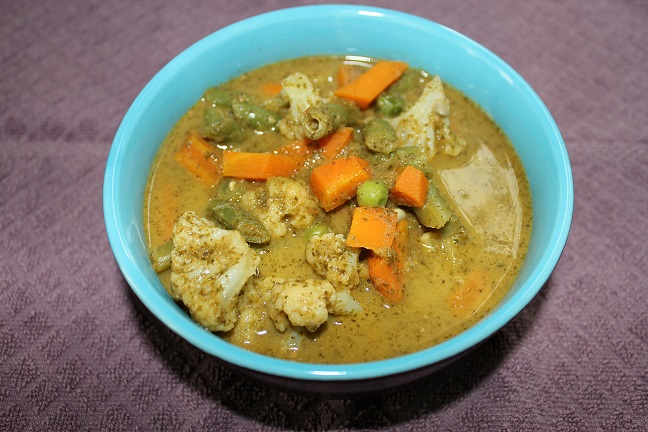
Thai green curry

Spicy comforter; best enjoyed with steamed rice!

Open faced Vege n Olives Sandwich(Danish Smørrebrød)

After moving to Copenhagen, I was quite amazed to see the sandwiches served here ,were 'open'. Open, in the sense, just one slice of bread with the cheese, butter, or meat. This is known as smørrebrød in Danish.
You can't go far in Denmark without noticing the beautifully decorated open-faced sandwiches!! The best thing was when we had ordered for a sandwich at a restraint, we were quite surprised to see the other slice of bread missing.

At home I decided to try the vegetarian desi-version of open faced sandwich. This would give you a truly unique Indo-Danish experience.
Open Faced Sandwich

Ingredients:

Bread Slices - 8
Cheese(Mozzarella)- 1 cup
Olives(Sliced)- 1/2 cup
Capsicum(Green,Red,Yellow)- 1 cup
Tomatoes(Finely Chopped)- 2
Olive oil- 1 tbsp.
Salt
Pepper(crushed)- 1/4 tsp

Method:

1.In a wok/kadai, take a tablespoon of olive oil, add the finely chopped tomatoes,capsicum and sauté for 2 minutes on a medium flame.
2.Add the salt and pepper, toss and remove from fire.
3.Preheat the oven for 180 degrees centigrade from 10 minutes.
4.On a baking tray, apply some oil or line with parchment paper. Place the bread slices and drizzle with some olive oil on the bread slices.
5.Take one teaspoon of the vegetable mixture and spread on all the bread slices. Place the olives on top.
6.Grate mozzarella cheese and bake for 8-10 minutes. Place the tray on the middle rack of the oven for all the sides of the bread to get toasted.

Yummy, open sandwiches are beaming at you.

Note: You can use shredded chicken, tuna, feta, canned pineapples, anything that catches your fancy.

Sorry, could not take any final pictures ,it got over in few seconds.

If you stop by,please do to leave a comment.

Egg Stuffed Khara Bun


Whenever I would pass through a patisserie ,it would often remind me of you so very Indian bakeries selling khara buns, vegetable patties, sweet buns, khara twists and the mava cakes. 

For a very long time , I was craving for a khara bun, not where you would slice into halves and apply a spread or some desi masala. So I decided to stuff the buns and then bake it.It was worth the effort!


Egg Stuffed Khara Buns


Ingredients:

For the Buns:

Maida/All purpose flour - 2 cups
Yeast - 2 tbsp
Sugar - 2 tsp
Salt - 1 tsp
Milk - 1/4 cup
Olive Oil - 4 tbsp


For the filling:

Eggs(Boiled)- 2
Tomato-1
Onion(finely chopped)- 1
Coriander Powder - 1/4 tsp
Red Chilly Powder-1 tsp
Jeera Powder-1 tsp
Salt to taste
Oil - 4 tsp


Method:

Preparing the yeast:

1.Heat 5 tsp of water to lukewarm temperature. Dissolve the sugar and add yeast. Mix and cover with a lid for 5 minutes, until it foams up.Yeast feeds on sugar.
*If the yeast has not foamed up, that means the yeast is dead and you need to start with a fresh pack.
*Another reason, might be the water was too hot to kill the yeast.
*Also, too much of salt kills the yeast.

Preparing the Dough for the buns:

2.In a large bowl, combine the all purpose flour, salt, olive oil. After the yeast has been activated, mix along with the flour and make a soft dough using enough milk.
3.On a clean kitchen counter, place the dough, knead for 10 minutes using the heal of your hand.
4.Transfer the dough into the bowl and cover with a damp cloth. Rest it for 1 hour. This is known as the 'first rise'.
5.After 1 hour, the dough would have doubled in size.
6.Punch back the dough.
7.Transfer the dough into the bowl and cover with a damp cloth. Rest it for another one hour. This is the 'second rise'.
8.After this, the dough would have again doubled in size.

Preparing the egg filling:

10.In a wok/kadai,heat 4 tsp of oil.Add the chopped onion and tomatoes,saute for 10 minutes.
11.Add the red chilly powder,coriander powder,jeera powder,salt and saute for 5 minutes on a medium flame.
12.Once the water has evaporated,slice the boiled eggs into two halves and combine well.
13.Allow the mixture to come to room temperature.


Assembling the Buns and Egg Masala:

14.Divide the dough into equal sized balls.
15.Roll each of the balls into medium sized round shaped discs with help of your hand,as shown in the picture below.


16.Now take the filling along with one half of the boiled egg and place on the disc(as shown in the picture below).Envelop from all ends and seal from all sides.


17.Assemble all the above on a greased baking tray and let it rest for another 1 hour.


18.Preheat the oven to 180 degrees centigrade for 10 minutes.If you have a fan oven, reduce the temperature by 20 degrees centigrade. 


18.Brush the top surface with milk or egg-wash and bake for 15-20 minutes at 180 degrees centigrade.Once you remove them from the oven,brush with butter for a shiny look.


19.Allow it to come to room temperature and when you dig in,it will bring you all the fond memories of  the Indian bakeries selling these.

If you stop by,please do to leave a comment.

Veg Calzone

Calzone is half moon shaped folded pizza made with bread dough,one of the famous Italian Street food.This can be had on the go and is a very convenient snack for travel.

All that goes in as a topping for pizza can be used as a stuffing.Typically it would be tomatoes,olives,mozzarella cheese,mushrooms,bell peppers and the lists goes on.What I tried, was my take on a healthy version of a calzone with potatoes and green peas.

Veg Calzone


Ingredients:

For outer cover:

Maida/All purpose flour - 2 cups
Yeast - 2 tbsp
Sugar - 2 tsp
Salt - 1 tsp
Milk - 1/4 cup
Olive Oil - 4 tbsp

For the filling:

Potatoes(Boiled and Mashed)- 2
Tomato-1
Onion(finely chopped)- 1
Green Peas(Boiled)-1/4 cup
Red Chilly Powder-1 tsp
Jeera Powder-1 tsp
Garam Masala- 1/2 tsp
Salt to taste
Oil - 4 tsp

Method:

Preparing the yeast:

1.Heat 5 tsp of water to lukewarm temperature. Dissolve the sugar and add yeast. Mix and cover with a lid for 5 minutes, until it foams up.Yeast feeds on sugar.
*If the yeast has not foamed up, that means the yeast is dead and you need to start with a fresh pack.
*Another reason, might be the water was too hot to kill the yeast.
*Also, too much of salt kills the yeast.

Preparing the Dough:

2.In a large bowl, combine the all purpose flour, salt, olive oil. After the yeast has been activated, mix along with the flour and make a soft dough using enough milk.
3.On a clean kitchen counter, place the dough, knead for 10 minutes using the heal of your hand.
4.Transfer the dough into the bowl and cover with a damp cloth. Rest it for 1 hour. This is known as the 'first rise'.
5.After 1 hour, the dough would have doubled in size.
6.Punch back the dough.
7.Transfer the dough into the bowl and cover with a damp cloth. Rest it for another one hour. This is the 'second rise'.
8.After this, the dough would have again doubled in size.
Preparing the filling:

10.In a wok/kadai,heat 4 tsp of oil.Add the chopped onion and tomatoes,saute for 10 minutes.
11.Add the red chilly powder,jeera powder,salt and boiled peas and cook further for 5 minutes.
12.Now add the boiled and mashed potatoes and cook further on a low flame for another 5 minutes.
13.Allow the mixture to come to room temperature.


Assembling the Calzone:

14.Divide the dough into equal sized balls.
15.Roll each of the balls into medium sized round shaped discs.
16.Now take the filling and place on one half of the disc(as shown in the picture below).Press and seal the edges properly to form a semi-circle.


17.Preheat the oven to 180 degrees centigrade for 10 minutes.If you have a fan oven, reduce the temperature by 20 degrees centigrade.


18.Brush the top surface with milk or egg-wash and bake for 15-20 minutes at 180 degrees centigrade.Once you remove them from the oven,brush with butter for a shiny look.

19.Serve hot....Best tea time snack ever.... 

If you stop by,please do to leave a comment.

Baked Corn Samosa

S a m o s a is one snack which is so synonymous to India.The firangis/foreigners call it the 'Indian Triangle',but you dig deeper its a world famous dish with different names in different countries.

Tamilnadu,India - Sumsa
West Bengal ,India - Shingara
Burma - Sumsa
Bangaldesh - Somucha
Pakistan - Samosa
Indonesia - Pastel
Africa - Sambusa
Israel - Sambusak
Maldives - Bajiyaa
Portugal - Chamucas


Think I went the whole world round with a 'Samosa' in my hand :D

As samosa is traditionally a deep-fried snack, I tried the baked version,which was so guilt-free binging.


Ingredients:

For Outer Cover:

 All purpose Flour - 1 1/2 cup
 Baking Powder - 1 tsp
 Salt - 1 tsp
 Oil- 4 tbsp+2 tbsp
 Water- 1/4 cup

For Filling:

Onion - 1
Tomato - 1 (small sized)
Corn Kernels(Boiled) - 1/2 cup
Potato(Boiled and Mashed) - 1/4 cup
Red Chilly Powder - 1/4 tsp
Amchur Powder/Dry Mango Powder - 2 pinches
Oil- 1 tbsp
Salt to taste

Method:

For preparing the outer cover:
We are preparing the outer cover first as we need to rest the dough for half an hour.
1.Combine flour,salt,baking powder,4 tbsp of oil, and enough water to make a soft dough.
2.Cover and allow it to rest.

For preparing the filling:
3.Chop the onions and tomatoes very finely.
4.In a wok/kadai, heat 1 tbsp of oil,add the onions and tomatoes and saute for 2 mins on medium flame.
5. Add red chilly powder,salt and cook for another 5 minutes.
6.Remove from fire and allow it to come to room temperature.
7.Add the boiled corn,mashed potatoes and amchur powder.Mix well and set aside.


Preparing the samosa:
8.Divide the dough and the filling into equal portions.Note that each ball that you roll ,will give you two samosas each.
9.Roll each ball into a small poori, and cut into two semi circles.
10.Using a basting brush,moisten the edges of the semi-circle with little water.This will allow you to form a cone and join the edges to seal the samosa.
11.Take both the edges of the semicircle and pinch them together, so that it forms a small cone.
12.Take 1 tsp of the filling,put inside the cone and seal it.Follow the same method for all the semicircles.


13.Arrange all the samosas on a greased baking tray or a baking tray lined with parchment paper.


14.Preheat the over at 200 degrees centigrade for 10minutes.
15.Before putting the samosas in the oven, coat the samosas with little oil using a basting brush.
16.Bake on each side for 10 minutes at 200 degrees centigrade in the centre of the oven.

Samosa Joke:(In hindi)

Ek Pathan Samosa khol kar andar ka masala kha rha tha
Ek admi ne pocha, pura kyun nahi khate ho,

toh Pathan bola"baba Doctor ne bahir ki cheez khane se mana kia hai".

Laugh and enjoy with a hot cup of tea !!

If you stop by,please do to leave a comment.

Old Fashioned Chocolate Cake

'No Eggs,no butter, and you call this a chocolate cake'. This was my first thought when I came across this recipe.Chocolate cake is a cake flavoured with melted chocolate or cocoa powder.Rocket science!! :D

The main ingredient being the cocoa powder, plays a great role in the kind of colour and flavour, so just be sure to buy a good quality one.

One benefit of using oil, instead of butter is that the cake remains soft when refrigerated and has a character in itself.This cake has a very tender crumb and is goes excellently well with a hot cup of coffee.


Chocolate Cake..how old fashioned!!


Ingredients:

All purpose Flour - 1 1/2 cups
Cocoa Powder - 1/4 cup
Sugar - 1 cup
Baking Powder - 3 1/4 tsp (I ran out of Baking soda while baking it,if you are using baking soda,the proportion would be Baking Powder: 1 tsp and Baking Soda : 3/4 tsp)
Vegetable oil - 1/4 cup
Warm water -  1 cup

Method:

1.In a large bowl, take the flour,cocoa powder,sugar and baking powder .Mix well until all the dry ingredients are combined.
2.Now add the vegetable oil and warm water and mix well until no lumps are visible.
3.Preheat the oven for 10 minutes at 150 degrees centigrade.
4.Bake the cake for 30 minutes at 150 degrees centigrade on the centre rack.As I have a fan oven, so 150 deg centigrade was ideal ,otherwise increase the temperature by 20 degrees.


5.Check if the cake is done by inserting a skewer which should come out clean.
6.Allow it to cool, and serve with a hot cuppa.

Few weeks ago, I had read this quote in the Reader's Digest Magazine ; just could not resist mentioning it here...

' Lets face it, a nice creamy chocolate cake does a lot for a lot of people, and it does for me' - Audrey Hepburn

 She was so right !!

If you stop by,please do to leave a comment.
Mutter Paneer ( with Almond n Cashew Paste )


Mutter Paneer is one the simple dishes which any one can cook.When my husband was longing for a paneer dish, I thought why not tweak a bit and make it really yummy.The result was mind blowing and once you attempt this, you would say a big goodbye to the boring old 'Mutter Paneer'.This dish has almond and cashew paste which makes this extra yummy and lip smaking.You can either make it the dry version or the gravy style, like how they would serve in any North Indian restaurant.The choice is yours.

Here I have made the dry version and added steps of making paneer at home.


Mutter Paneer


Ingredients:

For making paneer -
  Milk- 1.5 Ltrs
  Lemon Juice- 4 tbsp

Onion - 1 medium sized
Tomatoes- 2 medium sized
Peas- 2 cups
Ginger n Garlic paste- 1 tsp
Almonds(Blanched) - 4
Cashew - 4
Turmeric Powder- 1 tsp
Red Chilly Powder- 1 1/2 tsp
Coriander Powder- 1 tsp
Garam Masala- 1/4 tsp
Salt to taste

Method:

For making paneer


1.In a heavy bottomed pan,boil milk ,till its just about to boil over.Reduce the flame and add 4 tbsp of lemon juice.
2.Keep stirring the milk .This would result in curdling the milk.Now you will see that the whey water and the paneer  are getting separated.
3.Remove from fire and allow the contents to come to a room temperature.Take a thin muslin and pour the liquid thru it, to separate the paneer and the whey water.(See pic below)
4.Press the paneer to remove excess water and refrigerate for 1 hour before you use the paneer for the making the dish.This is basically to firm up paneer.


5.Blanch the almonds and grind in into a very fine paste along with the cashew.Set aside.
6.Finely chop the onions and tomatoes.
7.In a kadai/wok, heat 4 tbsp of oil,saute the onions,tomatoes,ginger garlic paste on a medium flame till the tomatoes are tender.
8.Add turmeric powder,red chilly powder,cashew-almond paste,salt to taste and 1 cup of water.
9.Cook with the lid on for 10 minutes and lower the flame.
10.Add the peas and cook covered for another 10 minutes till all the water has evaporated.This is the step where you can decide if you want a gravy or a dry dish.
11.Cut the paneer into bite sized cubes, and add them into the kadai, and cook for another 2 minutes.
12.Garnish with garam masala and remove from fire.
13.Serve hot with naan or roti.

Tip:

1.If you don't want to use cashew and almond paste,the dish can be garnished with  1/4 cup of cream.
2.Don't throw away the whey water, it can be stored in the refrigerator for 2 - 3 days, and used for kneading the dough for making rotis.This would give you very soft rotis.

If you stop by,please do to leave a comment.


Chicken Korma(Quick Method)


After moving abroad, without the mixie/mixer-grinder, I really need to think of a work-around with recipes which require grinding masalas in the mixer. Same was applicable when I wanted to make vegetable korma or the chicken korma. This is a very quick method which you can finish making in 15 minutes flat. Goes well with rotis, or toasted bread.

A life-saver recipe for any office-goer who longs for a ghar ka khana at the end of a busy day.


Chicken Korma


Ingredients:

Chicken(cut into small pieces)-250 gms
Onion - 1
Tomato - 2
Cinnamon - 1 inch stick
Cloves - 3
Fennel Seeds/Sombu - 1/4 tsp
Red Chilly Powder- 1/4 tsp
Oil- 2 tbsp
Coconut Milk- 1/2 cup
Fresh Cream-1/4 cup
Salt to taste

Method:

1.Thinly slice the onions and tomatoes. Clean the chicken and cut into small pieces. Set aside.
2.Take a heavy bottomed sauce pan. On a medium flame, heat 2 tbsp of oil and add fennel, cinnamon stick and cloves and sauté the onions and tomatoes till the tomatoes are softened.
3.Now add the red chilly powder and chicken pieces, sauté on low flame for 5 minutes.
4.Now add the 1/2 cup coconut milk,1 cup water, and salt to taste. Cover the pan with a lid and cook on low flame for 10 minutes.
5.Just before removing the pan from fire, add 1/4 cup of cream.
6.Stir well and serve hot with rotis or toasted bread.

Quicky lip-smacking Chicken korma is ready !! 

If you stop by,please do to leave a comment.

Modak/Modagam(Deep Fried Method)


In my earlier post, I had posted the recipe of a steamed modak.This Ganesh Chaturthi, I made two different varieties the steamed ones and the fried ones.The fried modaks are usually not made in the South India, but I have seen a lot of Maharashtrians making it.So I looked for a good recipe and attempted it this time.My Hubby's joke ' Even our Lord Ganesha gets variety this time! '.


Ingredients:

All purpose Flour - 1 cup
Water - 1/4  cup
Salt - 1/4 tsp
Baking Powder- 1/4 tsp
Coconut(Grated) - 3/4 cup
Jaggery - 1/2 cup
Cardamom Powder- 1 pinch
Cashew(broken into bits)- 2 tbsp
Ghee - 2 tbsp
Oil - to deep fry+2tsbp

Method:

1.Combine all purpose flour, 2 tbsp oil,salt, baking powder, and enough water to make a soft dough.

2. Apply some oil on the dough,cover and keep aside.
3. In a wok/kadai,heat 2 tbps of ghee and add the broken cashew bits till they brown a bit.
4.Add grated coconut,crushed jaggery and cardamom powder and cook for another 5 minutes, till the jaggery has liquidified.
5.Cook for another 10 mins till the water had evaporated and it becomes a semi-solid mass.
6.Turn off the heat, and allow it to come to room temperature.
7.Make equal sized balls of the dough and coconut jaggery mixture.

How to Make Modaks:

8.Flatten each of the dough balls with the help of a rolling pins to form a small sized poori.
9.Now keep this flattend poori in the middle of your palm and keep the coconut jaggery mixture in the center and envelop the poori from all sided to form a small packet/potli.
10.The upper portion of the dough has be given a form of a peak.This is the way a modak is made.

11.Heat enough oil in a wok/kadai and fry the modak till golden brown on a medium flame.Drain on a absorbant paper when done.

Deep fried modaks are ready!

If you stop by,please do to leave a comment.


Modagam/Modak (Microwave Method)


Come Ganesh Chaturti,I start dreaming of modaks.The steamed ones being my favourite.
Modak is a sweet steamed dumpling, which is offered to Lord Ganesha.He is also known as Modakpriya,meaning 'the one who loved modaks'.For every Ganesh Chaturti, my mom would make  many batches of these ,and I remember as a kid, I would always pop one as and when I would pass by the dining table. My mom still makes them, but so many miles away,I can only help reminiscing.

Note:The microwave which we have , has a steam option.So I steamed them in the microwave rather than using a pressure cooker.

Modagam/Modak


Ingredients:

Rice Flour - 1 cup
Water - 1 cup
Salt - 1/4 tsp
Coconut(Grated) - 3/4 cup
Jaggery - 1/2 cup
Cardamom Powder- 1 pinch
Cashew(broken into bits)- 2 tbsp
Ghee - 2 tbsp
Oil - 1 tsp

Method:

1.Combine rice flour,water,1 tsp of oil, and salt in a heavy bottomed sauce pan.
Note: Water : Rice Flour :: 1 : 1 ,ratio has to strictly followed , otherwise the dough will not be in the right consistancy.

2.On a medium flame,cook this mixture,stirring well till it has reached a semi-solid consistancy of a soft dough.
3. Remove from the fire and allow it to come to a room temperature.Knead thoroughly for 5 minutes till it reaches a consistancy that the dough is not sticky.Apply some oil on the dough,cover and keep aside.
4.In a wok/kadai,heat 2 tbps of ghee and add the broken cashew bits till they brown a bit.
5.Add grated coconut,crushed jaggery and cardamom powder and cook for another 5 minutes, till the jaggery has liquidified.
6.Cook for another 10 mins till the water had evaporated and it becomes a semi-solid mass.
7.Turn off the heat, and allow it to come to room temperature.
8.Make equal sized balls of the rice flour dough and coconut jaggery mixture.

How to Make Modaks:

9.Grease both your palms with little oil, and flatten one of the rice dough balls with the help of your finger to make a small disc sized.
10.Now keep this flattend rice flour disc in the middle of your palm and keep the coconut jaggery mixture in the center and envelop the flattend rice dough from all sided to form a small packet/potli.
11.The upper portion of the dough has be given a form of a peak.This is the way a modak is made or you can say a hand-made modak. :D

The same procedure can be done with a modak mould as well , but as I have never tried it nor have I seen my mom making it,cannot comment on how the shape would be.

12.Microwave Steaming:If you have a microwave with the steam option,arrange the modaks on a plate and keep a bowl of water and steam for 4 minutes.

13.Pressure Cooker Steaming:Grease the idly plates with little oil and place the modaks and steam without the pressure cooker whistle for 10 - 12 minutes on a medium flame.

Healthy modaks are ready for our Lord Ganesh to feast on.

Ganpati Bappa Moriya!!!

If you stop by,please do to leave a comment.

Egg Fried Rice


Fried rice is a common staple in oriental cuisine, most of the time termed as fast food. Fried rice can vary in appearance, from a dark brown appearance to a light brown appearance. All depends on what ingredients or sauces you want to add.

Bored of making Vegetable Rice/Vegetable Biryani, the Egg Fried Rice was something that came to my mind for a weekend lunch.It was good for a change, and as I wanted it plain, I did not add any masalas or sauces.As my version was very mildly spiced, we had it with Vegetable korma.


Egg Fried Rice


Ingredients

Eggs- 4
Rice- 2 cups
Water - 4 cups
Cinnamon Stick - 1 inch
Cloves- 3
Onion-1
Garic - 5 pods
Red Chilly powder- 1/2 tsp
Oil-5 tbps
Salt to taste

Method:(with freshly prepared rice)

1.Cut the onions lengthwise and finely chop the garlic pods.
2.In a wok/kadai, heat 1 tsbp of oil,break the eggs and make a scramble with little salt and red chilly powder.Once done,set it aside.
3.In the same wok/kadai,heat 4 tbsp of oil ,now add the cinnamon stick and cloves and saute for a minute.
4.Now add the chopped onions and garlic and saute for another 5 minutes on a medium flame,till the onions are golden brown.
5.Add 4 cups of water and add salt to taste.
6.Once the water starts to boil, add the rice and cook with the lid on for another 10 minutes on a very low flame.
7.Add the scrambled eggs and mix thoroughly and cook with the lid on for further 15 minutes,till the rice is cooked.
8.Fluff the rice with help of a fork,to avoid the rice from breaking.

Method:(with left over rice)

1.Cut the onions lengthwise and finely chop the garlic pods.
2.In a wok/kadai, heat 1 tsbp of oil,break the eggs and make a scramble with little salt and red chilly powder.Once done,set it aside.
3.In the same wok/kadai,heat 4 tbsp of oil ,now add the cinnamon stick and cloves and saute for a minute.
4.Now add the chopped onions and garlic and saute for another 5 minutes on a medium flame,till the onions are golden brown.
5.On a very low flame,add the left over rice , salt and mix well.
6.Add the scrambled eggs and mix thoroughly and cook with the lid on for further 10 minutes,till the rice and eggs are properly combined.
7.Fluff the rice with help of a fork,to avoid the rice from breaking as the cooked rice would have become even more soft while cooking.

Protien rich egg fried rice is ready.

If you stop by,please do to leave a comment.


Chickpea Cutlets


Come weekends, it would be time to cook some good tiffin/snack for my hubby for  evening tea.I was so bored of the same potato based tikkis/cutlets and the same time I did not want anything fried every weekend.I was in the 'eat-healthy' mode for sometime.LOL..

Then I came across the chickpea cutlets which had not potatoes in them.Tasted quite good and goes well with hot masala chai.

Chickpea Cutlet


Ingredients:

Chickpea/White Kabuli Channa(pressure cooked and mashed)-1 1/2 cup
Onion(finely chopped)- 1
Tomato(finely chopped)- 1
Jeera Powder/Cumin Powder- 1 tsp
Red Chilly Powder- 1 tsp
Coriander Powder-1/2 tsp
Salt to taste
Oil- 4 tbsp


Method:

1.Soak the channa overnight.Pressure cook the same till fully cooked.
2.Drain excess water, mash finely and set aside.
3.In a wok/kadai,heat 2 tsp of oil and saute the finely chopped onions and tomatoes.
4.Add cimun powder,red chilly powder,coriander powder,and salt and cook for 2 mintues.
5.Add 1/2 cup of water and cook for another 10 minutes on low flame till the water had evaporated and the masalas are cooked well.
6.Remove from fire,and allow it to come to room-temparature.
7.Combine the cooked onion-tomatoes with the mashed chickpea.
8.Make equal sized balls and flatten in the shape of a cutlet.
9.On a hot gridle,heat 1 tsp of oil and cook each side of the cutlet till golden brown.


Yummy hot channa cutlet is ready... :D

If you stop by,please do to leave a comment.

Spinach Packets (Cottage Cheese Stuffed)


After having seen spinach packets in the frozen section of the supermarket,though I did not find it
appealing to pick it up,I attempted making an Indian version of the same at home.

This goes best with hot masala chai and btw......'Anything deep-fried is so yummmmm at anytime of the day'.

Spinach Balls with  Cottage Cheese


Ingredients:


Spinach(blanched and pureed)-1/2 cup
Potatoes(boiled and mashed)-1 1/2 cups
Paneer/Cottage Cheese- 50 gms
Jeera Powder/Cumin Powder- 1 tsp
Red Chilly Powder- 1 1/2 tsp
Gram flour- 4 tbsp(heaped)
Salt to taste


Method:
1.Combine spinach,mashed potatoes,cumin powder,red chilly powder,gram flour and salt.
2.Make 10 balls of this mixture and equally divide the paneer as well.
3.Grease both your hands with little oil,take a ball and envelop the paneer into it.
4.Repeat the same for all the spinach-potato balls and refrigerate for 1 hour.

(You can make this the previous day also and quickly fry them when needed)

5.Deep fry the balls on both sides until golden brown.Drain them and serve them hot with tomato ketchup.


Spinach Packets(Paneer Stuffed)


A truly fast snack indeed !!!

If you stop by,please do to leave a comment.


Garlic Knots


Authentic Italian dinner rolls, garlic knots are made out of bread dough(with sauteed garlic) tied in a knot, baked and then brushed with olive oil. Usually served in pizza joints, made there out of left over pizza dough. This is a perfect tea-time snack.


Garlic Knots


Ingredients:

Maida/All purpose flour - 2 cups
Yeast - 2 tbsp
Sugar - 2 tsp
Salt - 1 tsp
Milk - 1/4 cup
Olive Oil - 4 tbsp
Garlic (Crushed) - 10 pods


Method:


Preparing the yeast:
1.Heat 5 tsp of water to lukewarm temperature. Dissolve the sugar  and add yeast. Mix and cover with a lid for 5 minutes, until it foams up.Yeast feeds on sugar.
*If the yeast has not foamed up, that means the yeast is dead and you need to start with a fresh pack.
*Another reason, might be the water was too hot to kill the yeast.
*Also, too much of salt kills the yeast.


Preparing the Dough:

2.In a large bowl, combine the all purpose flour, salt, olive oil. After the yeast has been activated, mix along with the flour and make a soft dough using enough milk.
3.On a clean kitchen counter, place the dough, knead for 10 minutes using the heal of your hand.
4.Transfer the dough into the bowl and cover with a damp cloth. Rest it for 1 hour. This is known as the 'first rise'.
5.After 1 hour, the dough would have doubled in size.
6.Punch back the dough.
7.Transfer the dough into the bowl and cover with a damp cloth. Rest it for another one hour. This is the 'second rise'.
8.After this, the dough would have again doubled in size.
9.In a wok, saute the crushed garlic in 2 tsp of olive oil until cooked and allow it to cool down.
10.Mix the sauteed garlic along with the dough and knead well.


Preparing the knots:

11.Roll the dough into a long cylinder.For bite sized garlic knots,cut into small portions.
12.now roll each portion into a long snake form. Do a knot and place the same on a baking tray greased with oil or parchment paper.
13.Leave some space between the knots as they tend to expand while baking.
14.Cover with a damp cloth and allow it to rise for another 1 hour.
15.Finally brush with olive oil and bake in a preheated oven for 10 minutes at 200 degrees centigrade.


16.After the baking process is over, using the GRILL mode, and further cook it for 10 minutes. This step is basically to brown the top.(Check your oven instruction manual regarding the placement of the tray while grilling. My oven requires the top shelf placement for grilling.)


Delizioso..

If you stop by,please do to leave a comment.